Recently installed Windows 11? Need help running programs or apps that worked flawlessly on prior versions of Windows? Well, it is a typical issue that some of your programs (or apps, games, or utilities) may not run or perform badly on your device, particularly after an upgrade. Running the compatibility troubleshooter is one of the easiest ways to check if a program is compatible with the current version of Windows. The compatibility scanner examines and identifies underlying issues. Is the Windows 11 compatibility troubleshooter not working? In this post, we have provided several potential resolutions to the problem. However, before we begin, let’s understand how to use the Windows compatibility troubleshooter. Let’s get started.
How To Easily Use Compatibility Troubleshooter On Windows?
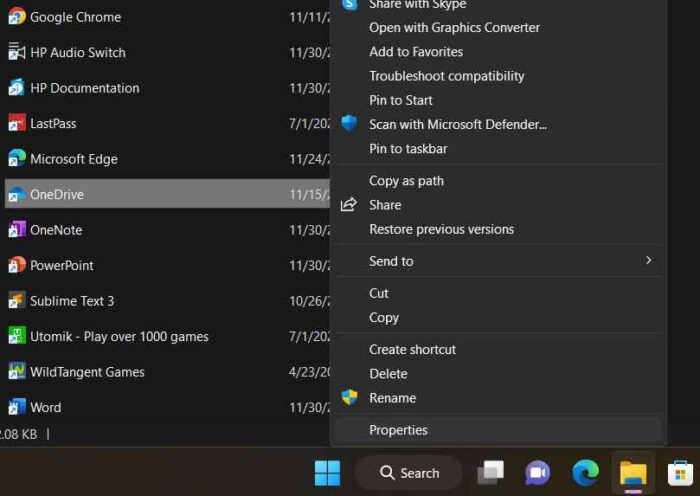
1 – Tap the search icon on the Taskbar and type the name of the program or app you need to troubleshoot. Select the “Open file location” option by right-clicking the program’s name.
2 – You will now be routed to the location of the file. Right-click the app’s name and select “Properties.”
3 – At this point, the Properties window will display on the screen. Switch the tab to “Compatibility.”

4 – To begin, click the “Run compatibility troubleshooter” button.
Follow the on-screen prompts to complete the troubleshooting procedure.
How To Easily Fix Compatibility Troubleshooter Not Working on Windows 11?
Set TEMP And TMP Variables
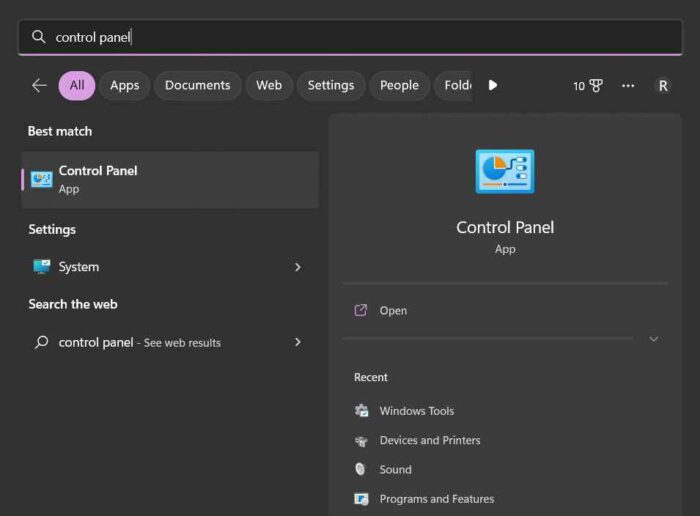
1 – Tap the search icon on the Taskbar, then type “Control Panel” and press the Enter key.
2 – In the search box of the Control Panel window, type “Environment variable.”
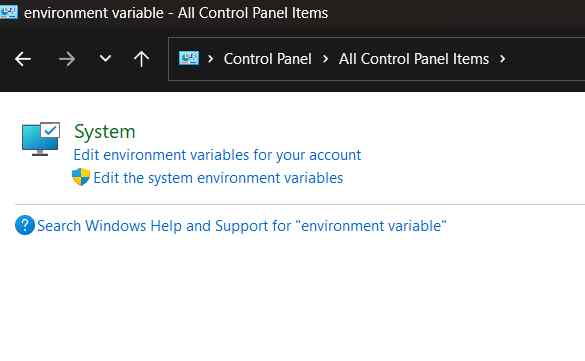
3 – Choose the “Edit system environment variables” option now.
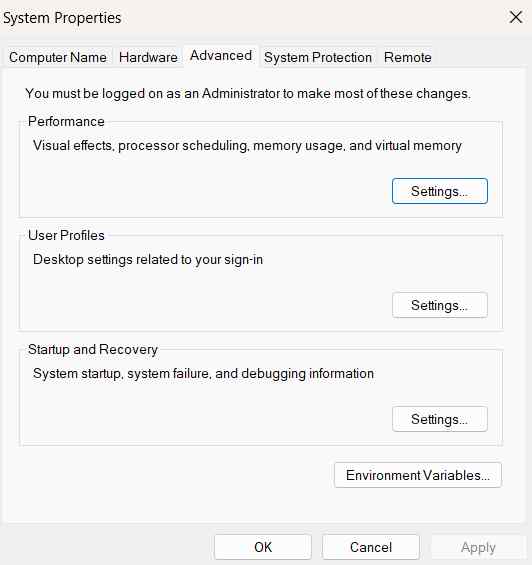
The screen will now display a new window. Tap “Environment Variable” from the button.
4 – Check that the TEMP and TMP variables’ path is set to the C: drive. If it is not set to the C: drive, select it and click “Edit.” For example, change the value of the variable to “C:\Temp.”
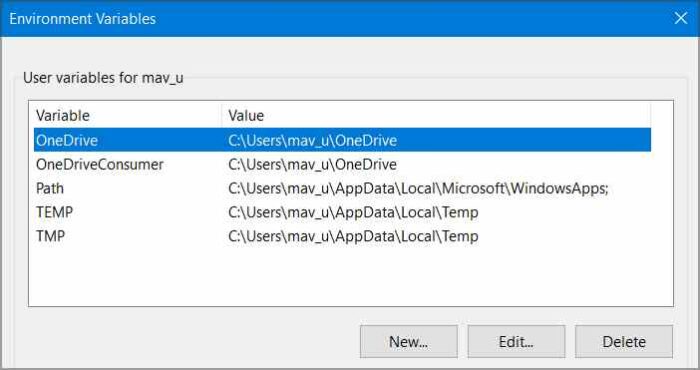
5 – Click the OK button to save modifications.
Changing the value of the environment variable can help resolve the compatibility troubleshooter not working issue. Please give it a try!
Boot Windows In Safe Mode
1 – Tap the Windows symbol, then tap the “Power” icon. While holding Shift, tap “Restart.”
2 – Once your device has restarted, the following options will appear on the screen:

3 – Choose “Troubleshoot.”
4 – Tap “Advanced Options” followed by “Startup Settings.” Press the “Restart” button.

Now, the Startup settings will show on the screen. To enable safe mode, use the F4 key and select “Enable Safe Mode.”
In Safe Mode, your Windows PC will not boot. Use the Compatibility Troubleshooter to determine if the problem has been fixed.
Enable Cryptographic Service
1 – To launch the Run dialogue box, press the Windows + R key combination. Enter “Services.msc” and then press Enter.
2 – Look for “Cryptographic Services” in the Services window. Double-tap it to open its Properties window.

3 – Set the “Startup Type” value to “Automatic.”

4 – Click the OK and Apply buttons to save the modifications.
5 – After manually activating the cryptography service, run the compatibility troubleshooter to check whether the issue continues.
Flush DNS Cache And Reset Winsock Catalog
Here’s another important workaround for Windows 11‘s “Compatibility Troubleshooter not working” issue.
1 – To run Terminal in admin mode, tap the search button on the Taskbar, type “Command Prompt,” then select “Run as administrator.”

2 – Type the following command in the Terminal window and then press Enter to run it:
ipconfig /flushdns

3 – Now, run the following command to reset the winsock catalog:
netsh winsock reset
After performing both commands, restart your computer to check if the issue has been repaired.
Reset Windows
Need help resolving the issue after attempting the solutions mentioned above? You can reset your Windows computer as a final option. Here is what must be done:
1 – Open the Settings app and switch “System” from the left-hand menu. Select “Recovery” by scrolling down and selecting the option.

2 – Tap the “Reset this PC” option.

Now, Windows will present you with two options: Keep my files and Remove Everything.

3 – Choose your favorite option to continue. Tap the “Continue” button. Follow the steps on-screen to reset your Windows computer.
The Bottom Line:
Here are a few straightforward fixes to the Windows 11 compatibility troubleshooter issue. Consequently, if you encounter any issues when running to run the compatibility troubleshooter on your device, you can use any of the workarounds mentioned above. Was this article useful? Please feel free to express your ideas in the comments.