Meetings held online can be recorded. Because it allows users to go back and examine what was discussed, several online meeting technologies have warmed up to the notion of a recorded meeting. As a result, online meeting solutions such as Microsoft Teams, Skype, and Zoom all have the ability to record a meeting.
How To Record Zoom Meeting On iPhone
The Zoom allows you to record meetings, but there are certain restrictions. A recorded meeting is saved either locally or on the cloud. A paid Zoom account is required to store a meeting in the cloud, which is the biggest impediment to recording a Zoom meeting on an iPhone.
How To Record Zoom Meeting On iPhone – Paid Zoom Account
A paid Zoom account makes it extremely simple to record a meeting on a mobile device. Well, This is due to the fact that the recording is saved to Zoom’s own cloud, and the device’s own storage space is irrelevant.
1- Launch Zoom and start a meeting (or join a meeting where the host allows recordings).
2- Tap the More Options icon in the lower right corner.
3- Choose Record to cloud.
4- The recording of the meeting will start.
5- After the meeting, you may access them through the Zoom web interface’s Recording tab.
How To Record Zoom Meeting On iPhone – Free Zoom Account
If you do not have a paid Zoom account, you will have to rely on a recording solution that works outside of Zoom. Fortunately, iOS offers a built-in screen recording feature that is ideal for the purpose.
Make sure you have adequate disk space and that the recording toggle is conveniently accessible before you begin recording.
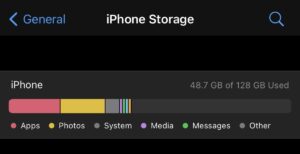
Check Storage Space
1- Launch the Settings app.
2- Navigate to Settings>General>iPhone Storage.
3- Look for free space at the top.
Add Recording Toggle To Control Panel
1- Launch the Settings app.
2- Navigate to the Control Center.
3- Make that Screen Recording is enabled under Included Controls.
4- If it isn’t, from the list of controls, tap the plus button next to it.
Record Zoom Meeting
You may now record the Zoom meeting. Well, You can start recording before or after the meeting begins. It is all up to you.
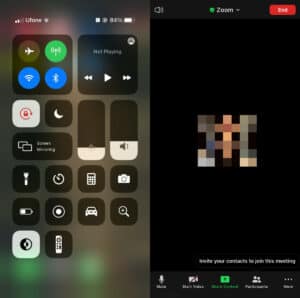
1- Open the Control Panel by swiping down from the top right corner of the screen.
2- Tap the Record control.
3- The recording will start, and the time will be displayed with a red accent to indicate that it is still in recording.
4- To stop the recording, tap the red highlighted time.
5- You may access the recording using the camera roll/Photos app.
The Bottom Line:
If you record a Zoom meeting on your iPhone using the iOS’ recording function, the recording will be highlighted in red. Meeting attendees will be unaware that they are being recorded, so inform them ahead of time that they are.


